

- Connect your store: lets your agent look up orders, products and shipping in your online store.
- Inbound connections: lets your other systems (a CRM, a calendar, a booking or form tool, or your own code) send contacts and events into RuleInside.
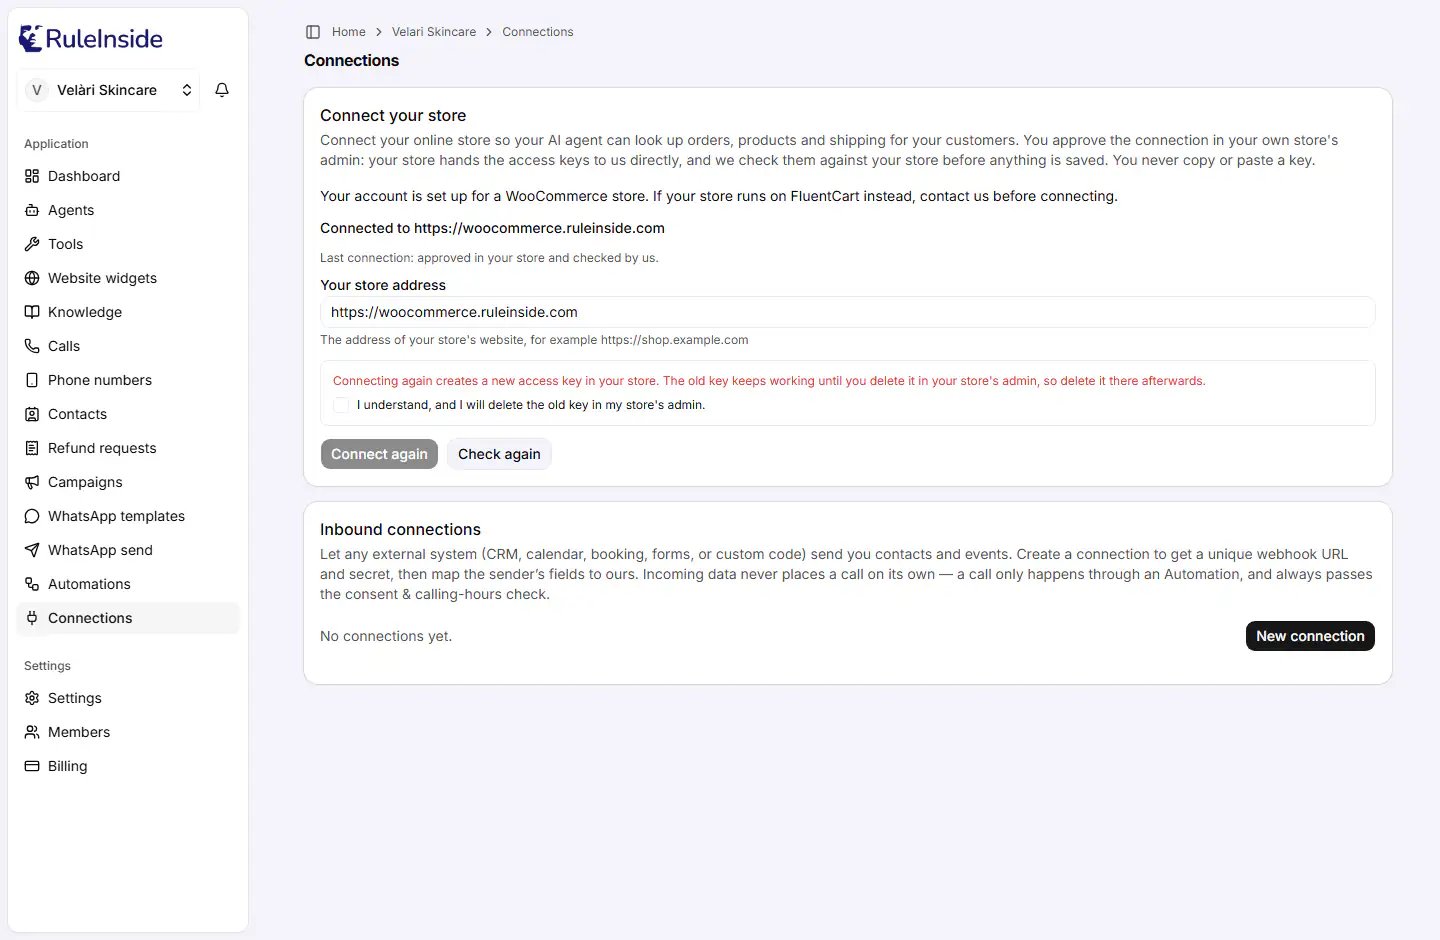
The Connections page: your store at the top, inbound connections below.
Who can do what
- Everyone on your team can see whether the store is connected, see the inbound connections, and use Copy URL.
- Only the owner can connect the store and create, switch on or off, change the secret of, or delete an inbound connection. Members see a note that only an account owner can do this.
Connect your store
You never copy or paste a key. You approve the connection in your own store’s admin, your store hands the access keys to us directly, and we check them against your store before anything is saved. The first line of the card says which kind of store your account is set up for. This is set when we set up your account; there is no store type to choose on this card.Fields and buttons
Connect a WooCommerce store
1
Enter your store address and click Connect your store
Use the public
https address of your store.2
Approve the connection in your store
Your store’s own WooCommerce approval page opens in a new tab. Approve the app named RuleInside (followed by
your account id) with read and write access. WooCommerce offers no narrower choice, and your agent makes
some changes in your store.
3
Come back and click Check again
Your store sends the access keys straight to us, and we test them against your store before saving. The card
shows the result.
Connecting again
What the last attempt says
Messages when you click Connect
Inbound connections
An inbound connection gives another system its own web address (a webhook URL) and a secret to send you contacts and events. You then say where each field is in the data that system sends.Incoming data never places a call on its own and never gives calling consent. A call only happens through an
Automation, and always passes the consent and calling-hours checks.
Create a connection
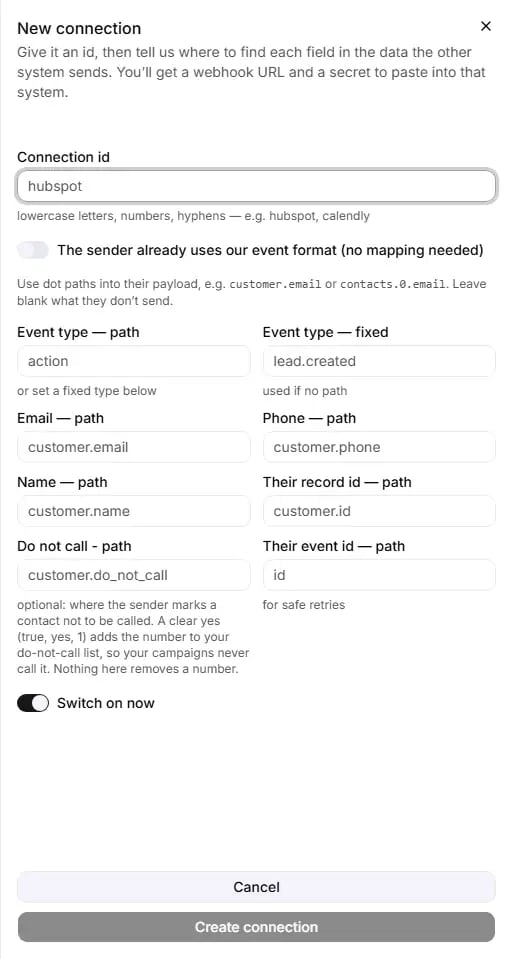
The New connection panel: an id, then where each field is in the sender's data.
With the format switch off, tell us where each value is in the sender’s data, using dot paths.
customer.email
means “the email inside customer”; contacts.0.email means “the email of the first contact”. Leave blank what the
sender does not send. Each path can be up to 200 characters.
Click Create connection (available once a Connection id is typed). If the format switch is off and every
mapping field is blank, you are asked to map at least one field or switch on the format option. If the id is
already used, you see that a connection with that name already exists.
On success you see “Connection created.” and the credentials panel.
Copy the URL and the secret
After you create a connection, or after New secret, a yellow panel shows:- Webhook URL, with a Copy button;
- Header (X-RI-Ingest-Secret): the secret, with a Copy button. The sending system must send it in an HTTP
header named
X-RI-Ingest-Secretwith every request.
Each connection on the list
The card shows how many connections you have. Each one shows:- its Connection id and a badge: Active (switched on) or Off;
- its webhook URL;
- an On / Off switch (owner only). It takes effect straight away, with no save button. If the change fails, the switch flips back and you see “Could not update the connection.”;
- Copy URL (everyone): copies the webhook URL;
- New secret (owner only);
- Delete (owner only).
Do-not-call from your own system
A connection can say where the sender marks a contact not to be called (Do not call - path). A clear yes adds the number to your do-not-call list, so your campaigns never call it. These values count as yes, in any mix of capital and small letters:true, yes, y, 1, si, sì, sí.
The number blocked is the one in the message, together with every number already stored for a contact matched by
their record id or email.
Nothing sent this way removes a number from your do-not-call list. A connection can only add numbers.
Our event format
If you switch on “The sender already uses our event format (no mapping needed)”, each message must be a JSON object like this one:typeis required: 1 to 64 letters, digits,.,_or-.event_id,occurred_atandpayloadare optional.contactneeds at least one ofemail,phoneorexternal_id. It can also carrynameandattributes.
What the sending system gets back
Common questions
Do I have to paste an API key from WooCommerce?
Do I have to paste an API key from WooCommerce?
No. You approve the connection in your store, and your store sends the access to us directly.
I connected again, and now there are two keys in WooCommerce
I connected again, and now there are two keys in WooCommerce
That is expected: the old key is not removed automatically. Delete the older one in your store’s admin.
The card says it is waiting for me
The card says it is waiting for me
You have not approved the connection yet, or you closed the approval tab. The approval page is valid for 10
minutes; start again if it has expired.
My store runs on FluentCart
My store runs on FluentCart
For now our team connects FluentCart stores. Contact us and we connect yours with you.
Which systems can I connect with an inbound connection?
Which systems can I connect with an inbound connection?
Any system that can send a secure (HTTPS) request with JSON data and a custom header. There is no fixed list.
I lost the secret
I lost the secret
Click New secret and update the sending system with the new one. The old secret cannot be shown again.
Will sending contacts here make my agent call them?
Will sending contacts here make my agent call them?
No. Calls only happen through an Automation, after the consent and calling-hours checks.
Can a connection remove a number from my do-not-call list?
Can a connection remove a number from my do-not-call list?
No. A connection can only add numbers to it.